Grain Spawn Jars
Grain Spawn Jars
Couldn't load pickup availability
- Secure Payment
- Discreet Shipping
- Worldwide Shipping
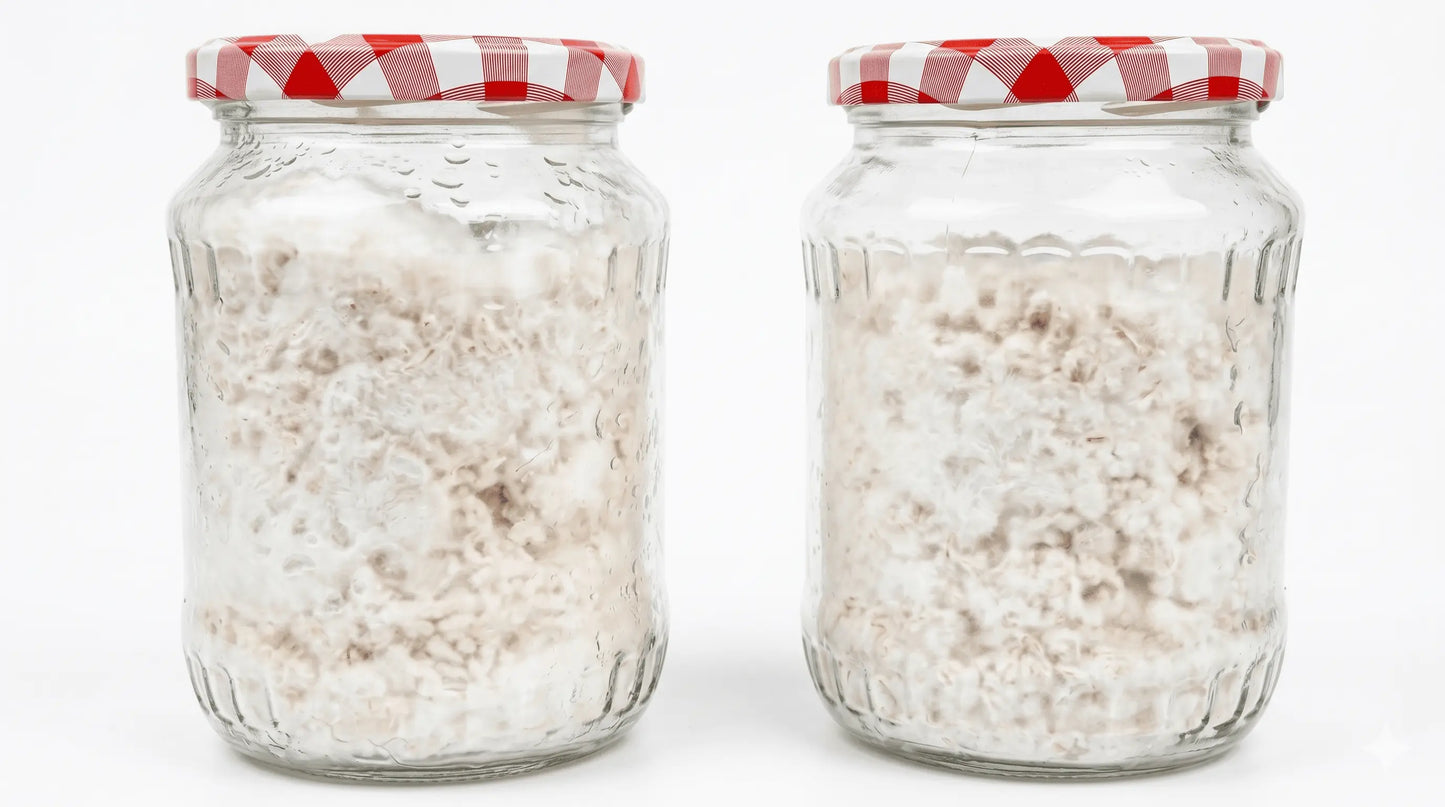
Grain Spawn Jars for Strong, Healthy Mycelium Growth
Our Grain Spawn Jars give you a sterile, reliable environment to grow mycelium from the first inoculation to a full harvest. Available in 210ml and 720ml, these mushroom grow jars work for every stage of cultivation, from agar transfers to PF Tek fruiting.
Three Ways to Use Your Mushroom Growing Jars
1. Agar Inoculation (210ml) Use the self-healing injection port for spore-to-agar transfers. The sealed port delivers a 95% contamination-free success rate without needing a flow hood or glove box.
2. Grain Spawn and Mycelium Colonization (210ml and 720ml) Fill with your preferred grain, inoculate, and colonize. The 720ml jar holds enough colonized grain to support a full monotub. The 210ml works well for smaller runs or experimental batches.
3. PF Tek (210ml) No extra equipment needed. Inoculate, colonize, and fruit directly from the 210ml jar using the classic PF Tek method.
Why These Grain Spawn Jars Work
Pressure Cooker Safe up to 15 PSI Built to handle full pressure cooker sterilization cycles without cracking or warping. Reliable across many repeated uses.
95% Contamination-Free Success Rate The self-healing injection port reseals after every syringe injection. Less contamination means fewer failed jars and less wasted grain.
No Pressure Cooker Required for Beginners These jars can be used with steam sterilization or stovetop methods. You do not need a full pressure cooker setup to get started.
Sized for Real Results The 720ml jar gives enough grain to colonize a dense pin set in your monotub. The 210ml fits agar work, PF Tek cakes, and smaller grain batches without wasting substrate.
Rust-Resistant Zinc Coating Every lid hole is coated with 99% zinc. The coating holds up after repeated sterilization cycles so the lids stay clean and usable long term.
How to Make Mushroom Grain Spawn
What you need:
- Grain Spawn Jars (720ml recommended)
- Rye, wheat, or oat grain
- Pressure cooker
- Spore syringe or liquid culture
Step 1 - Prepare your grain Simmer your grain for 60 to 90 minutes until fully hydrated but not split open. Drain well and let it surface-dry before filling your jars.
Step 2 - Fill your jars Fill each 720ml jar about three quarters full. Leave headspace for airflow during colonization.
Step 3 - Sterilize Pressure cook at 15 PSI for 90 to 120 minutes. Let the jars cool completely to room temperature before inoculating.
Step 4 - Inoculate Inject your spore syringe or liquid culture through the self-healing port. No open flame or flow hood needed.
Step 5 - Colonize Store at 21 to 24°C in a dark spot. Give the jar a gentle shake once partial colonization is visible to speed up the rest. Full colonization takes 2 to 4 weeks depending on the species.
Step 6 - Use your spawn Break up the colonized grain and transfer to your bulk substrate or fruiting chamber.
Jar Specifications
| Small Jar | Large Jar | |
|---|---|---|
| Volume | 210ml | 720ml |
| Best for | Agar, PF Tek, small batches | Grain spawn, mycelium colonization |
| Pressure rating | Up to 15 PSI | Up to 15 PSI |
| Lid coating | 99% Zinc | 99% Zinc |
| Injection port | Self-healing | Self-healing |
Frequently Asked Questions
Can I use these jars without a pressure cooker? Yes. These jars work with steam sterilization and stovetop methods. A pressure cooker gives the most reliable sterilization but is not required to get started.
What grain works best? Rye berries are the most common choice because they colonize quickly and hold moisture well. Wheat, oats, and popcorn also work well with these jars.
How many times can I reuse the jars? The jars and lids are built for repeated use. Clean and re-sterilize between batches. The zinc coating and self-healing ports hold up over time.
Do these jars work for all mushroom species? Yes. They work for oyster mushrooms, shiitake, lion's mane, reishi, and most other gourmet and medicinal species.
1. How to Use Mason Jars to Grow Mushrooms?
1. How to Use Mason Jars to Grow Mushrooms?
You use mason jars as part of the growing process. They provide a clean and controlled environment where the mycelium can develop safely before being transferred to the substrate, where the mushrooms will eventually grow.
2. What is the Recommended Grain Fill Level for Optimal Mycelial Growth?
2. What is the Recommended Grain Fill Level for Optimal Mycelial Growth?
It’s best to fill the jars to about 75% of their capacity. This leaves enough space to break up the mycelium later, which significantly increases the growth speed.
When the jar is about 30–40% colonized, break up the mycelium to create more inoculation points, allowing it to spread faster.
It’s also a great way to test the strength and health of your mycelium, as only strong cultures will recover quickly.
3. Which Grain Should I Use?
3. Which Grain Should I Use?
You can use a variety of grains such as brown rice, whole oats, rye, bird seed, corn, and many others. There is no single best grain, but some options like brown rice tend to colonize faster than others, which is why we prefer to use brown rice for consistent and reliable growth.
4. How Can I Tell if My Jar Are Contaminated?
4. How Can I Tell if My Jar Are Contaminated?
You can usually tell your jars are contaminated if the growth suddenly stops or the appearance changes, such as turning slimy or showing green or red spots.
Another way to check is by the smell. A sweet, sour, or unusual odor after growth has stopped is a strong sign of contamination. Fresh, healthy mycelium should smell earthy and similar to fresh mushrooms.
5. My Jar is Contaminated. What Should I Do Now?
5. My Jar is Contaminated. What Should I Do Now?
First, do not open the jar indoors to avoid spreading mold spores. Next, throw it away outside in the trash. After that, wash the jar thoroughly with hot water and soap. Finally, sterilize or disinfect the jar, and it will be ready to use again.